Showing posts with label skirt. Show all posts

Friday, 8 March 2013

Ms. Coco Moneypenny

Got a bit of sewing mojo back this week and tackled the Centre for Pattern Design's CC inspired fold skirt.

And I quote:
Once upon a time a former student brought her aunt's unforgettable skirt to class, done by a famous Parisian designer.  I had to try it -- and here it is.  This skirt is deceptively simple, using a single pattern piece with no visible vertical seams.  It closes with two bias sashes that tie in the back, creating a single front fold with a hidden zipper on the right under the fold.  The skirt is cut on the straight with a contour facing at the back waist.  Sizes 8 - 18.  

One piece pattern with a single seam! How do they do it? OK, you have to insert a zip and sew up a few darts but heck! One seam, a zip and a hem?

The fabric is a woven wool with all sorts of colours in there: green, yellow, purple, navy. Although slightly stiff it takes a good pressing to produce an excellent crease.
It looks better close up but from a distance is a rather mucky air force blue.

The fold looks like a wrap but it's not. The front has a beautiful V shape that draws the eye downwards and away from the waist. The fold also allows for ease of movement without you being concerned about what's showing when you walk.


While I love the ties, I made this particular skirt for everyday wear and choose to cut the ties short to fit just around my waist and hence, turned them into a waistband with a three button closure.

The waistband it high, but I like that as it seems to hold more of the wobbly bits in check. As my fabric was rather robust it didn't gather as in the pattern image but another softer fabric would produce that effect.


The waistband is still unconnected to the skirt and acts like the original ties but with buttons instead.

An everyday skirt with a touch of unusual. I do feel rather prim and proper wearing it, especially with a white cotton shirt and this just may my ticket to efficiency in the administration section of my job, in which I am currently lacking terribly. I hate paperwork! 
Now there's a idea - wear clothes to make you better in your job! Do any of you have any evidence?


I had this pattern cut in a previous fabric around Christmas time but realised soon enough that the colour was not for me and put it up for a giveaway as a skirt kit. Super-sewer, Janice from Scotland bagged the kit and made it up with the scant instructions that I provided. Her finished article is a  fabulous skirt; sparkly silver tweed with silver satin waist ties. I now wish this colour would look good on me. Regardless - Janice looks fab and made an excellent job. I hope she is as pleased with her results as I am.


You can see how the satin ties gather and pleat on Janice's version and it looks wonderful with just black.

In my humble version I lined the whole thing - surprise surprise - and had to resort to hand sewing to secure the lining along the one and only seam

Do not be seduced by the one piece, one seam thing thinking this is a quick make - take your time - it is not a straightforward sewing experience. I often mistake lack of pattern pieces with a quick sew. This pattern requires thought, figuring out - especially the waistband and it pays to carefully consider and plan before ploughing headlong to the machine. I had to elongate the seams for better fit and of course the hand sewing added a few extra hours. But it's worth it.

I'm planning a few more of these for S/S in cottons and lighter weight fabrics.


Saturday morning is information day for prospective students who want to come to college in September 2013. I planning on wearing this skirt, my glasses propped on my nose and a scowl on my face. Anyone who signs up for my course has passed the first recruitment phase!
(Oh, I might put a blouse on too!)


Monday, 29 October 2012

Paco's Apron skirt

I was very fortunate this week to receive as a gift two new patterns from Paco Peralta. They are the Treky top and the Apron skirt. I don't have any fabric in the stash for the Treky top and due to circumstances beyond my control, I have been rather house-bound for a few days and didn't get out to go fabric shopping. However, I did have a length of fine checked wool so opted to make the apron skirt first.


You may already know of Paco and his designs - simple, elegant with exquisite cutting and finishing details. I've made quite a few of his patterns and I'm never disappointed. Just go to the Labels box on the right and click Paco for a sample of previous makes.

You’ve got to love Paco and his simple but elegant and classic designs and the very fact that he releases the patterns to the world at large and lets home sewers loose on them but let’s face it, his instructions are weak – actually non-existent. He does a brilliant job of showing construction details and tricks on his blog - http://uniquedesignerpatterns.blogspot.co.uk/2012/10/falda-apron-skirt.html but the rest is left up to you.

While I was making this I kept a photo journal and have written instruction sheets, so if you decide to purchase and make this skirt, then download the PDF here. If you want to see how I made the skirt just for the heck of it, download it anyway.

Paco has labelled this skirt as Very Easy: I don't think I'd go that far - there are a few tricky bits - but on the whole it is straightforward.

The front panel is the 'apron'. It is cut separately and sewn in place over the curved front piece.
To make a little bit of interest I cut the apron on a different grainline - hence the darker colour.

My fabric has a fine check (plaid) and I would have liked to try cutting it on the bias but alas, not enough fabric.


I fell stitched the apron by hand so that I could keep control of the curved corners. I must say however, that the pattern pieces fit together flawlessly. See the curve at the top of the side panels? This is shaped so that it is cut on the bias, there is a slight stretch, and so fits perfectly around the hips - genius!


A perfect fitting skirt that will work at the office, home and, made in the right fabric, a night out too.

The back has four panels, invisible zipper and a centre split

The skirt is fully lined, which I also attached by hand. It is straight but not tight, quite conservative but with unique design, formal but just a little bit sexy. Happy girl with her well fitting skirt.

ADDITIONAL PICS: ADDED WHEN I HAD MAKE UP ON AND WITH BETTER LIGHTING
2 days after final construction.


 Worn today with Draped Top from 3 Hours past.. (unfortunately no longer available but if you plague Stephanie, she might re-draft it - it is invaluable) made in a brown knit with chiffon edging, lace up boots and the high waist of the skirt emphasised with a hand made snake skin belt.

Go on, get it. You know you need a good workhorse of a skirt like this.
Disclaimer - not getting paid for this endorsement.


Wednesday, 24 October 2012

The 62 Years Suit

These two were made for each other and there's only 62 years separating them. The skirt from Vogue DK 1324 circa 2012 and the opera coat, also from Vogue vintage 1950. Perhaps the longest 6PAC to complete ever!

I made the skirt previously in leather so I knew what the pitfalls and hazards were,  however, sewing it up in a wool woven was so much easier.

First up, the lining is an integral part of the skirt: it is sewn to the middle waistband and then turned to the inside. I also caught my lining into the back split. I couldn't quite make heads nor tails of the instructions for that part so I just went with what worked.

Trickiest bit - the side waistbands! Yet another of my pet hates and things I'm miserable at - sewing into a point, pivot, and sew. I just cannot do this with a machine so I either resort to hand stitching or working out an alternative construction method. As every seam on the skirt is top stitched (even the darts) I used this as my alternative method - folded in the seam allowances and topstitched to the skirt; similar technique to the Issey Miyake shirt collar but used the machine instead of hand stitching.


The skirt has triangular side panels rather than side seams and these create interest and shape. I find them to be somewhat slimming and flattering but that might just be wishful thinking and my rose tinted glasses.
This is a better picture for the actual colours of the fabric - it is duck-egg blue and taupe in wiggly, zig-zaggy lines.


Next thing to keep your eye on is the invisible zip closure at centre back - match those waistbands on either side as the zip extends all the way to the top. Mine went in twice!


The matching coat is fabulous - not my particular making of - but the style and wearability is just excellent. The pattern is for a reversible coat, patch pockets, 3/4 length kimono sleeves, stand up collar and huge cuffs. I did search for a suitable matching/coordinating fabric with which to make the reverse but came up empty. I couldn't take a chance on internet shopping because of colour matching. I went ahead and made the coat in an unlined version.


The fabric frays like mad and the seams would be on show without a lining, so I flat felled them all, like in a man's shirt. 


The top stitching on the coat now reflects the topstitching on the skirt! The coat is loose and swingy - no buttons or closures - but you could add them. For the front facings I used the interfacing pattern piece and slip stitched the collar over the raw edges.


 I didn't pay attention to how the stripes of the fabric would lie so there is a kind of mixed up pattern thing going on. The pockets are self lined and the big flap is loose and just folds over. I'll be wearing this with jeans and trousers and pyjamas and anything else I can possibly get away with - I love it so much. Big winter blanket comes to mind - but be warned the sleeves are extremely narrow just below the elbow and would need widening with a thicker, chunkier fabric.


Worn above with the wierdo Donna Karan batwing top and worn below with the Issey Miyake shirt. 


 My first attempt at a coordinated, planned (LOL), synchronised sewing set.

If you have been waiting on pics of the leather pants, I'm afraid you'll have to wait a little longer. My sewing machine isn't playing so most of the stitching is now being done by hand. If they ever get finished and don't fall apart on first fitting it will be a miracle. Could well be made into a bag yet......


Friday, 5 October 2012

Deutsches Safari


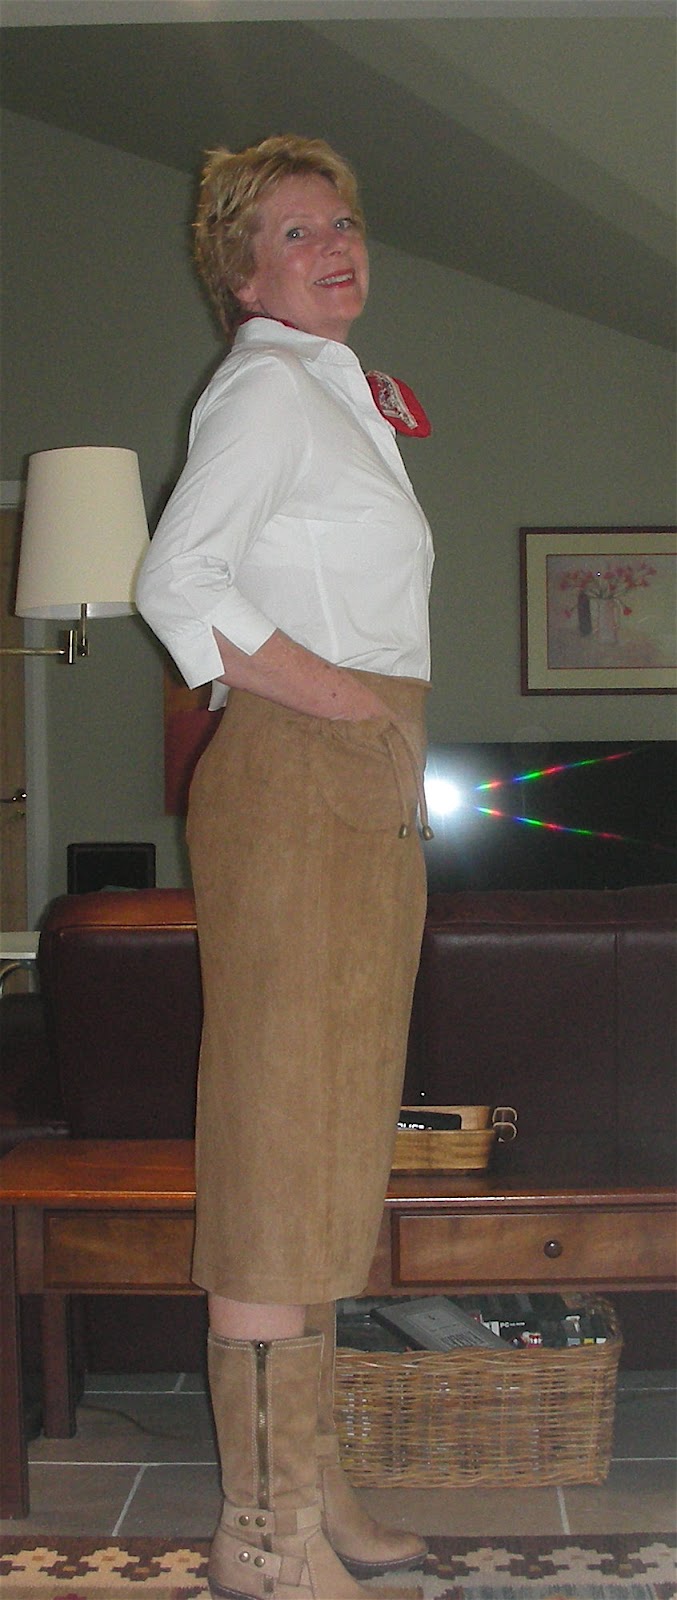
 Meanwhile back at the ranch the  German adventure in dressmaking has been continuing with The Safari Skirt.

Since starting this sewing blog I'm finding that I "name" all my garments - do you? I've no idea why I call this Safari maybe the colour of the brushed cotton reminds me of sand, or perhaps the semi-utilitarian style.

The fabric was ordered with the intention of making a pair of jeans (yes, another pair) but when it arrived it made its way directly to this pattern and I didn't argue.

Another good thing about the Pattern Company is that they sell the hardware that they use to make the clothes - so I ordered the waist clasp, the tie ends and the tie holders; just like the photo.

Well, my translation didn't quite match up with the instructions as there is a rather glaring difference between what the skirt is supposed to look like and what mine turned out as.
The clasp at the waist pulls together the front and back, creating a bunched up gathered effect - mine is without this. I just couldn't get my head around how to attach the straps and keep the skirt loose. So I went for the 'fitted' look. It's quite neat that the back strap is sewn into the back dart. The front still falls into a pleat though almost like a wrap around.


Pocket placement was for two pockets either side at mid-thigh but I thought this was too much attention grabbing at that area and opted instead for one pocket at hip height. The pockets are lovely: semi-circular with ties threaded through to gather the pocket closed. Unfortunately the opening in the clasps to hold the ties are too small for my fabric made ties. The pattern calls for elastic string but I didn't have any. I'll keep the clasps for another project.


In keeping with the hardware on show on the skirt I put in a semi-exposed jeans zip at the back. What an excuse for poor zip insertion!


I lined the whole thing (as usual) and really it sits so much better. The fabric is quite thin and there were a lot of underwear lines showing before the lining was inserted. The lining is actually another bed sheet that I bought in the wrong size for teenage son's bed. We don't have a bed that it fits so it went into the sewing room to be put to good use.


Right I'm off hunting.... Ruth


Saturday, 16 June 2012

Parole for Prisoner 101

You may remember my prisoner smock - Burda May 101/2012 and how disappointed I was with the sack-like look. Many of you very kindly offered commiserations and some great styling tips and improvements I could try. Most of these included creating a waist line. Oh yes you know me well and this is what I need. I really don't suit straight up and down looks. But my enthusiasm waned so the smock was rolled up into a little ball and tossed into the stash box - out of sight - while I contemplated its fate and got on with real life.
I love the cross weave cotton though - organic, a muted blue tone, casual and yet classy - I didn't want to not use it, if you know what I mean?


Then Prttynpnk posted this .........................       


Classic and simple pencil skirt with colour complimentary blouse - just beautiful. 

So the smock was dragged out of the box followed by a swift snip snip snip of the scissors. The front and back seams were ripped apart, the pocket openings sewn closed and this is what is left of my original 2m of organic cross-weave cotton. It is a quite narrow fabric and having already cut it I was going to be limited in what I could make.

 Thankfully the smock fronts and backs were cut on the lengthwise grain without any shaping at waist or hips, so I had 4 rectangular pieces, already underlined.
It's a bit of a mess inside where the pockets used to be but the clipping required for the pockets to work left me with very little fabric to tidy up with.

I dug out an old pattern for a pencil skirt free from a magazine that my mother gave me ages ago: self-facing waist with long darts front and back which are exactly the same shape on both by the way. The colour matching lace was put to good use too and slip stitched around the hem to look like my petticoat was hanging down. 


I had to make a side split to enable normal walking and ran the lace up to the point of the split. I mitred the corners to make it sit sit nice and flat too.


So, parole has been granted to Burda 101. She showed unremitting remorse at the hearing and the parole board granted her a second chance. She has been warned to behave well and contribute to society like a good citizen should and she promised she would, except she acts more like linen with those wrinkles.


The top is my first RTW item in almost three years. It's from TK Maxx and the colours went so well with the skirt that I couldn't resist. Nor could I resist mucking about with either - it didn't look like this when I bought it. It was two rectangles with seams on the outside and a belt threaded through buttonholes on either side - like a beach cover-up. I created sleeves and removed the excess fabric that was floating around the outside of the blouse so that it could be tucked in when required. I kept the belt to use as such or maybe a scarf or maybe a twilly round my wrist.


We don't have the warm, golden light of the south of France here - too far north - but what I do have is a wearable skirt.
Have you ever re-hashed an already made garment or just admitted that despite the hours of work you've put into something that it just doesn't work?


Thanks for reading. Ruth